Follow the Steps Mentioned Below
Step 1
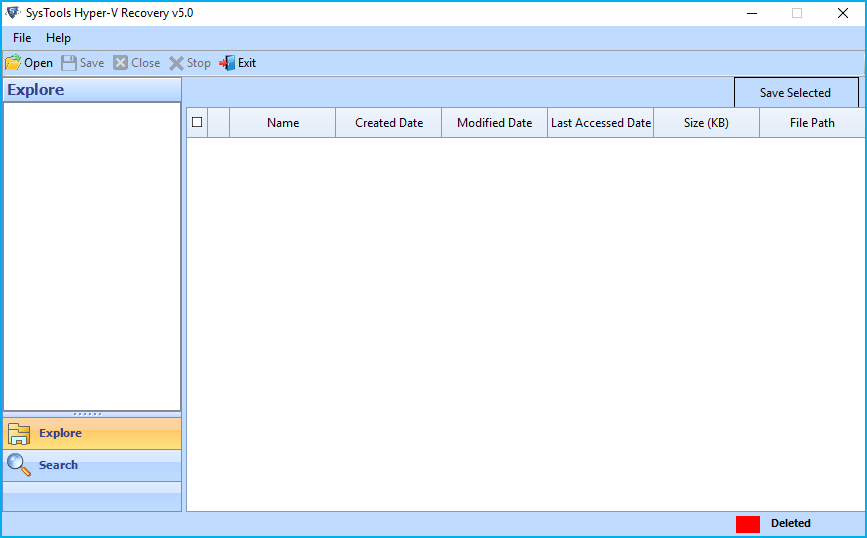
Download and install the Software. The home window of this software will appear like this.
Step 2
From the software start-up screen, Click Open to locate source file.
Step 3
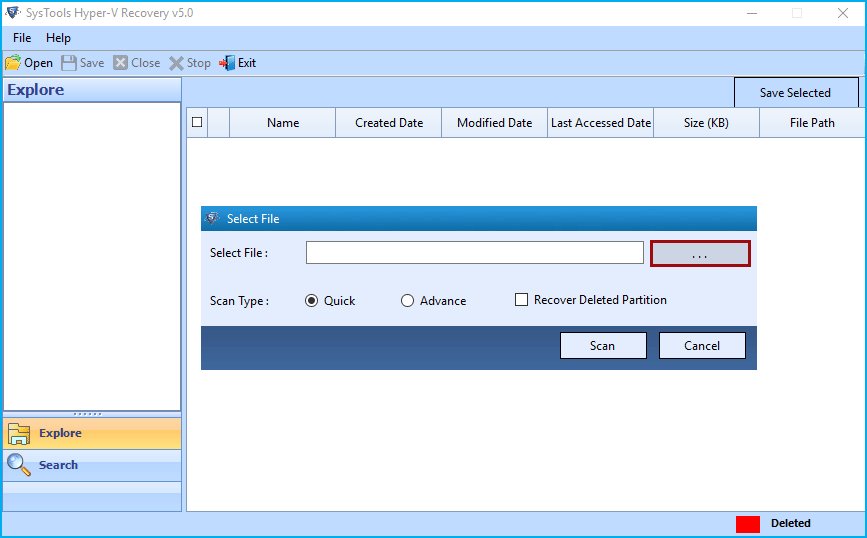
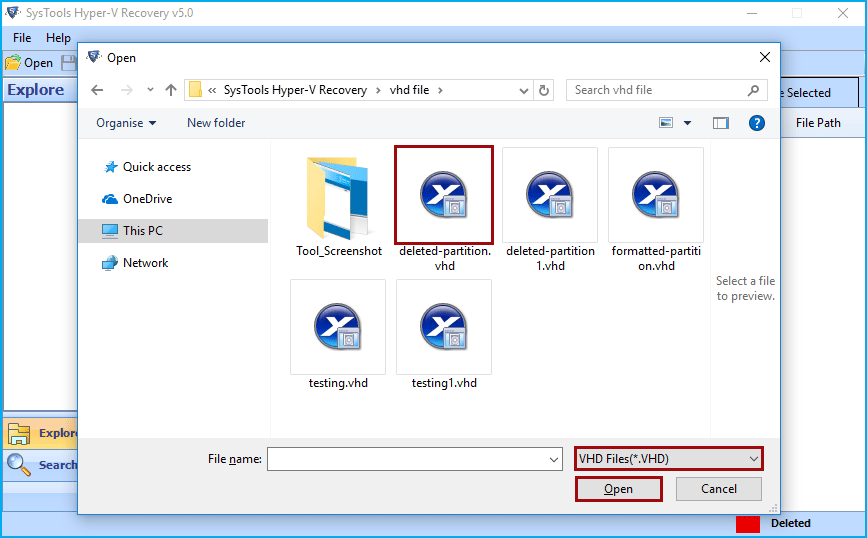
After that hit on browse button ... and select either VHD or VHDX file
Step 4
Here software will provide you option to select either VHDX or VHD file. Simply select one and proceed to next.

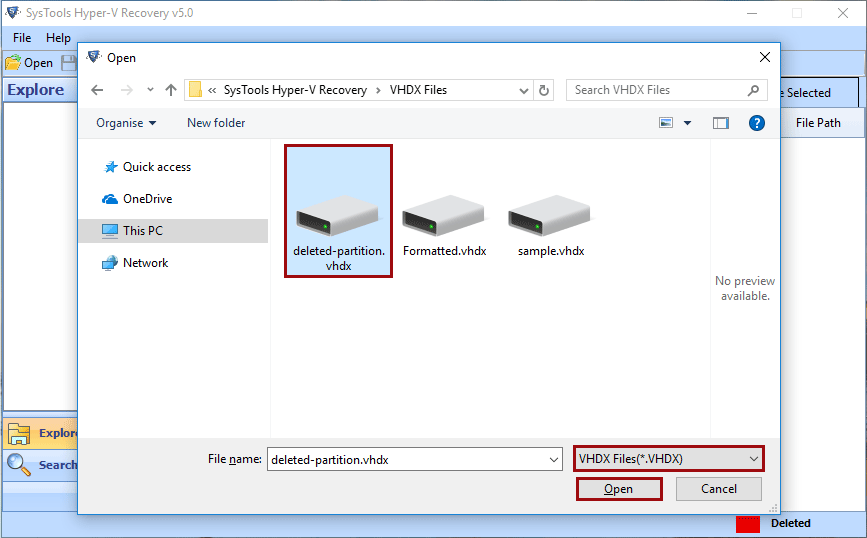
Step 5
After selecting VHDX from list, now select the .vhdx file and hit on Open button.
OR
After selecting VHDX from list, now select the .vhdx file and hit on Open button.
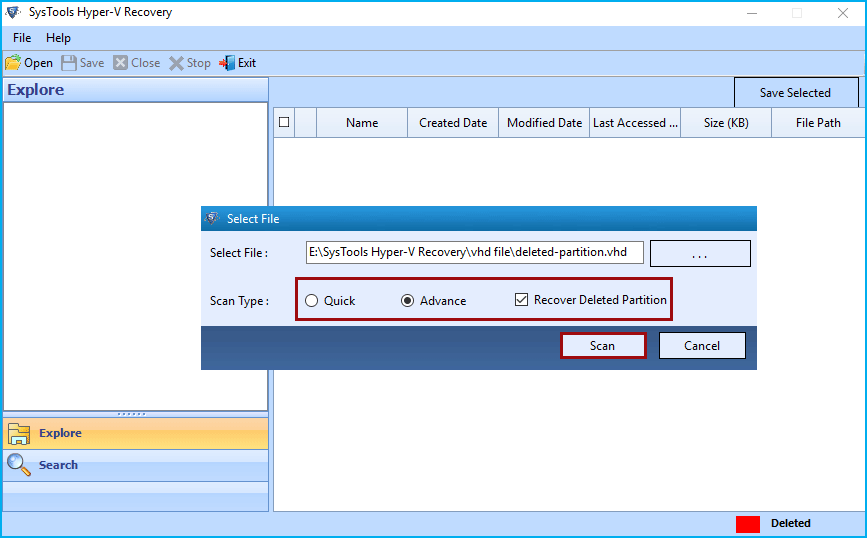
Step 6
Here the software will provide three scanning options, select required one and click on Scan button.
- Quick: - Select this option, if the .vhd or .vhdx file healthy. It will scan and list complete data quickly.
- Advance: - If the .vhd or .vhdx file is corrupted then select this option.
- Recover Deleted Partition: - Check this option for deleted partition recovery from .vhd or .vhdx file.
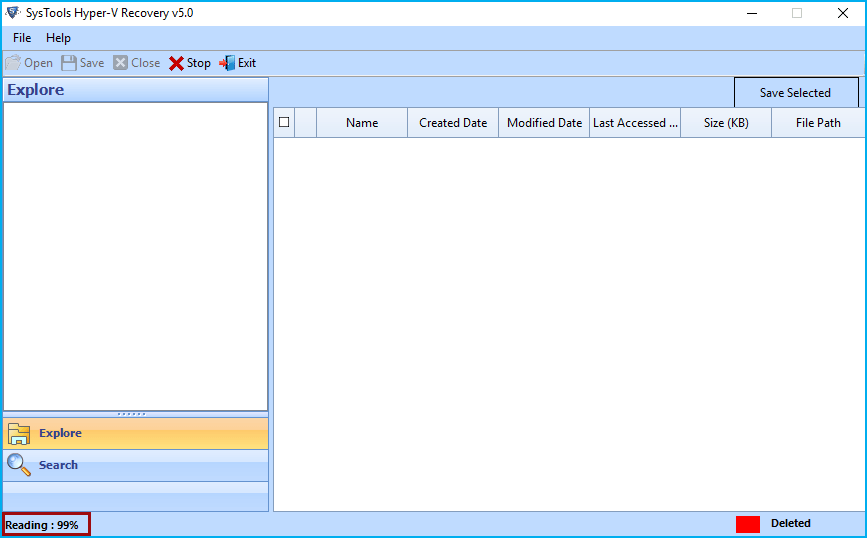
Step 7
Now the software will show you the reading percentage. Wait till it reaches to 100%.
Step 8
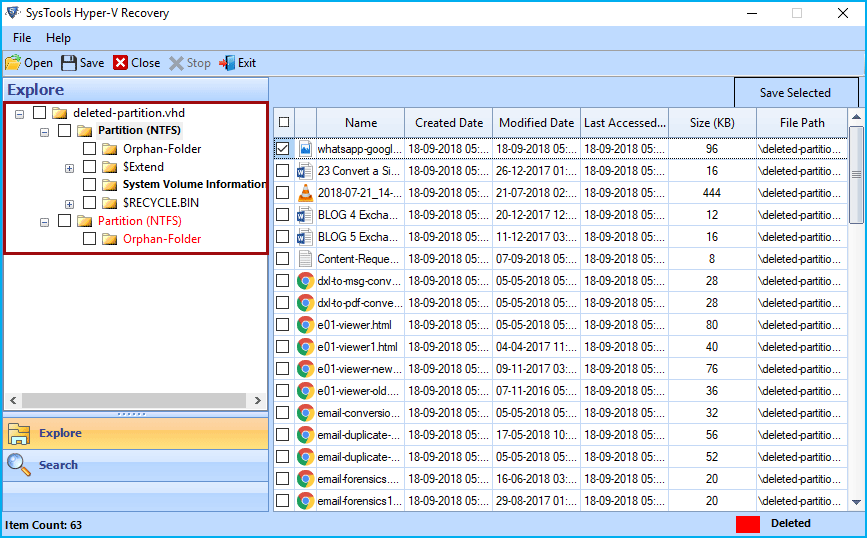
The software will list the root folder in the software explore panel. Simply explore the root folder.
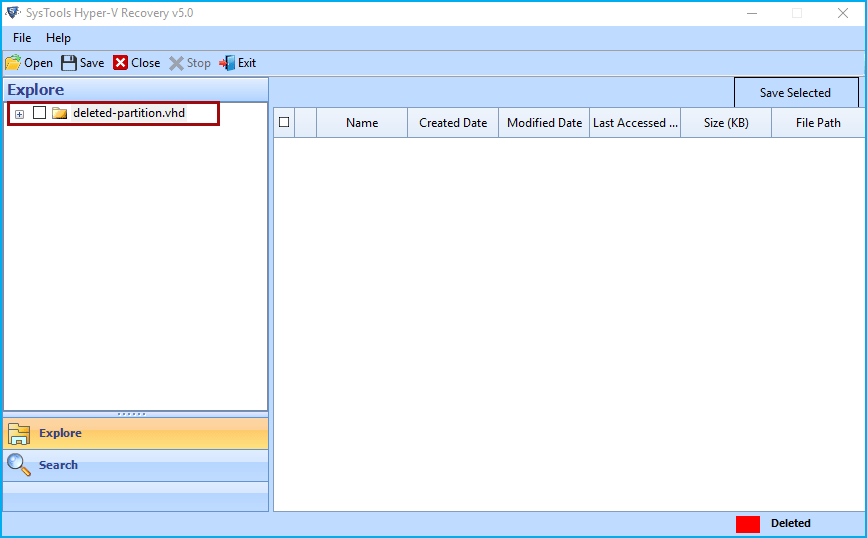
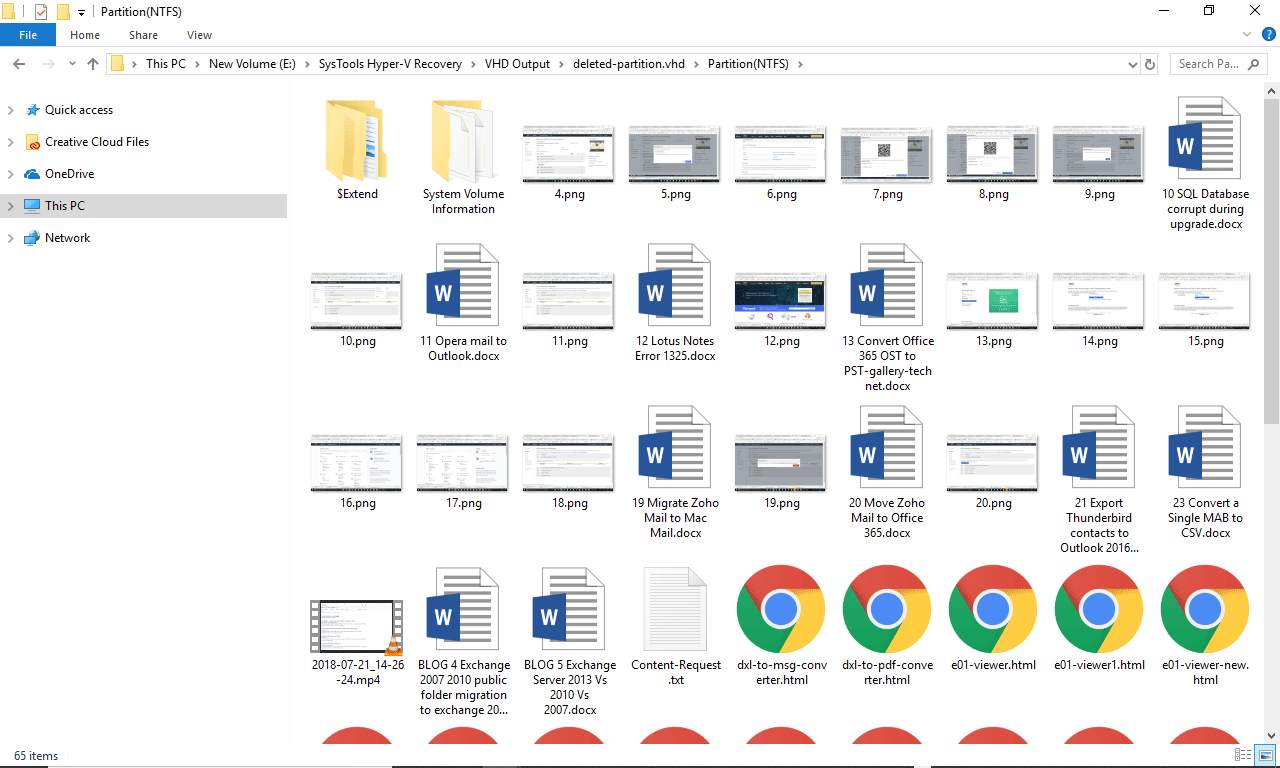
Step 9
Now view all recovered folders and select the required one and view complete data into right-side of software window. The deleted partition will be highlighted in red colour.
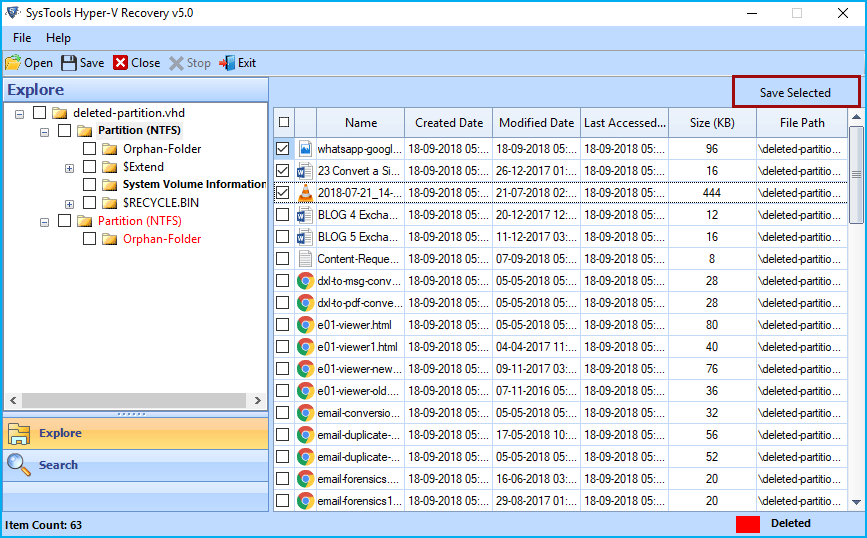
Step 10
- The software provides two option to save recovered data either Save selected data or Save complete recovered data.
- For selected data: - select the required file from right-side of software panel and hit on Save Selected button as highlighted.
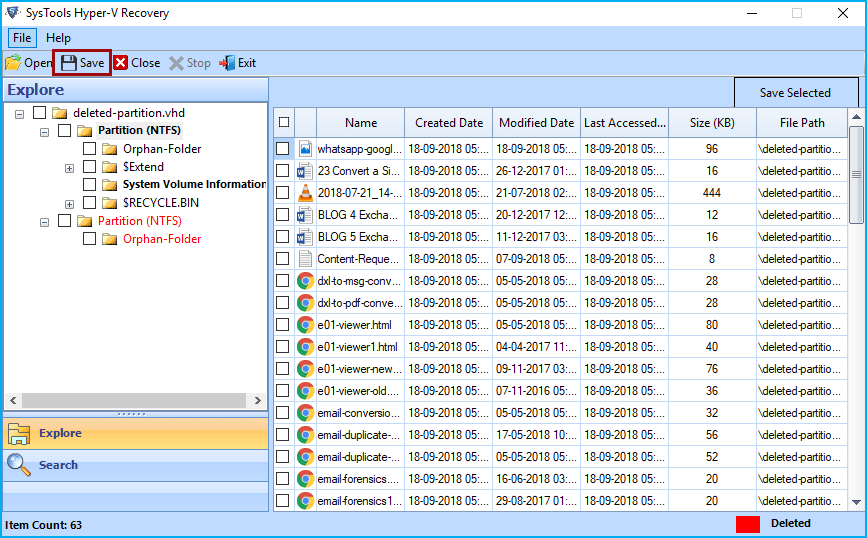
Step 11
For Complete Data: - Select the folders from Explore Panel of software and hit on the Save button from menu bar as highlighted.
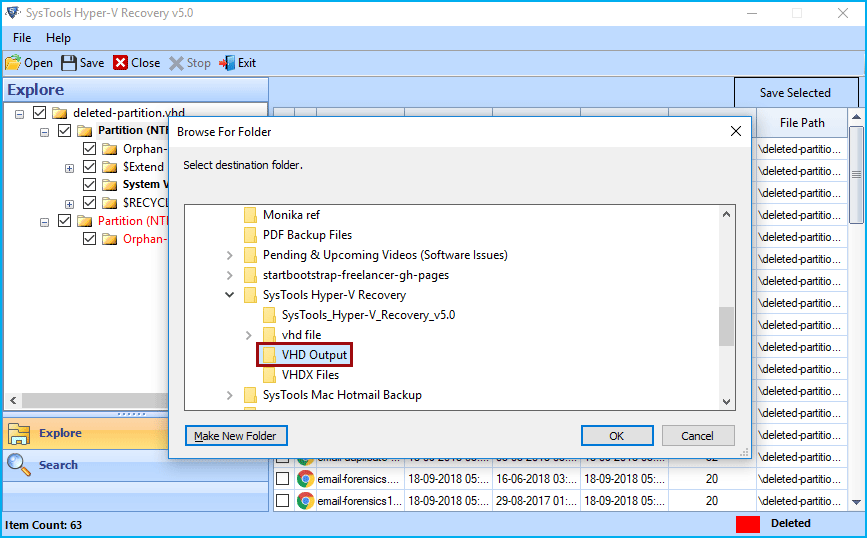
Step 12
Now Browse the location to save resultant file. You can either create new folder or select an existing folder to save recovered data. After selecting folder hit on OK button.
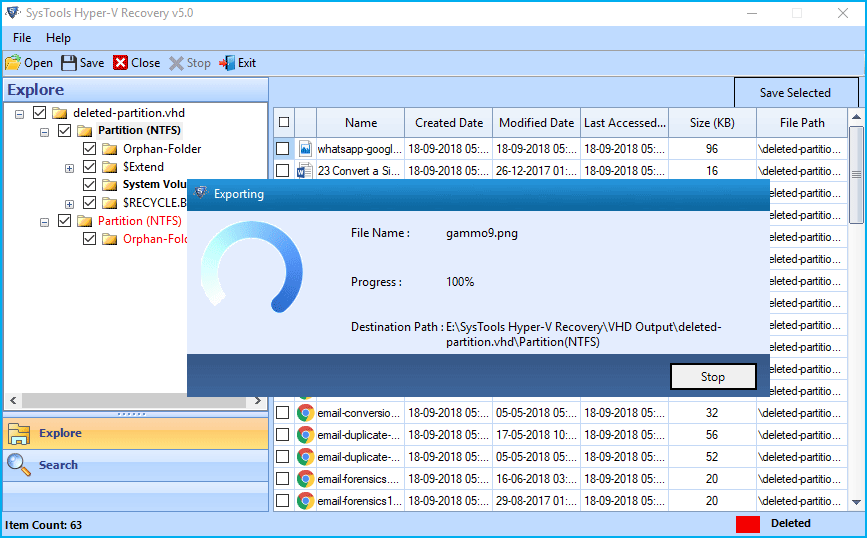
Step 13
The software will start exporting recovered data and show you export progress detail.
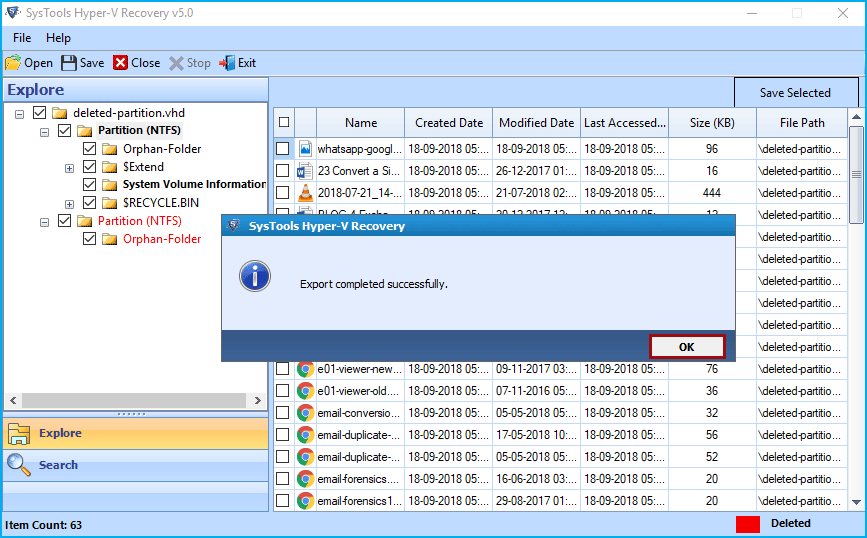
Step 14
After completing export process the software will show you a success message, simply hit on OK button.
Note: User can create new folder by clicking on “Make New Folder” button
Step 15
Go to the location which you browsed to save resultant file and view complete recovered files and folders.